How to arbitrate a campaign using Gyrinx
Take charge and keep track of your players using our tools

Let’s look at running a Gyrinx campaign from an arbitrator’s perspective. If you’re looking for guidance on how to play in a campaign instead, head here (we’d recommend all arbitrators read that article as well).
Starting a campaign
Select Campaigns from the banner at the top of the page. This will take you to the list of your campaigns.
From there, choose Create a new Campaign. You’ll be taken to this page:
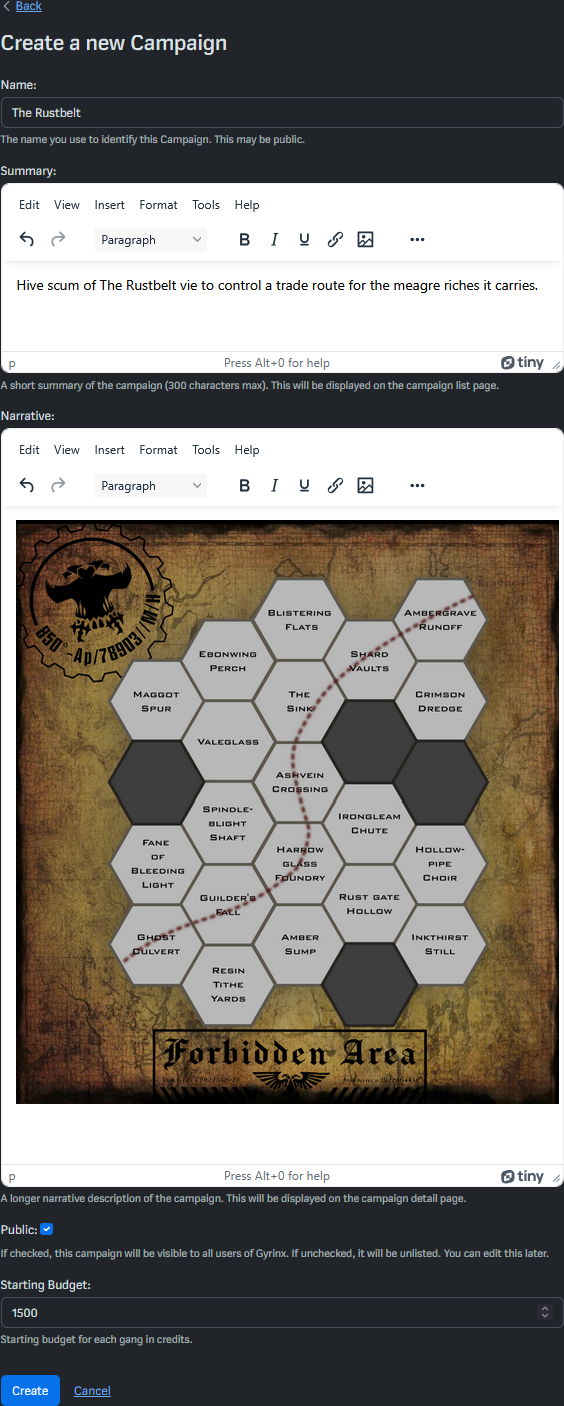
From here you can fill in the details of your campaign such as the title, summary and narrative. The summary will be displayed as a subtitle in your list of campaigns, and at the top of the Campaign Dashboard page.
Both the summary and narrative sections can be formatted to include rich text, images and even a link to your campaign documentation.
There are two more options on this page, the public checkbox, to determine if your campaign is publicly searchable and the starting budget, the number of credits each gang gets to start.
Once you are happy, press Create (don’t worry, you can edit all these settings later) — you’ll be taken to the Campaign Dashboard.
The Campaign Dashboard
The Campaign Dashboard is your key hub for keeping track of what’s happening in the campaign. It’s composed of several panels:
- Gangs: shows all the gangs who have joined the campaign, as well as their ratings and owners.
- Campaign Assets: shows all the assets available to control in the campaign, and who currently controls them.
- Campaign Resources: shows current counts for campaign resources, such as Scrap or Meat.
- Battle Reports: shows reports from the latest games played in the campaign, in reverse chronological order.
- Captured fighters: shows all fighters currently captured in the campaign, and who holds them.
- Action Log: shows actions taken within the campaign in reverse chronological order.
All of these panels have buttons (in the top right) to access expanded views or add content. For more explanation about how players interact with them, head to the campaigns (for players) article.
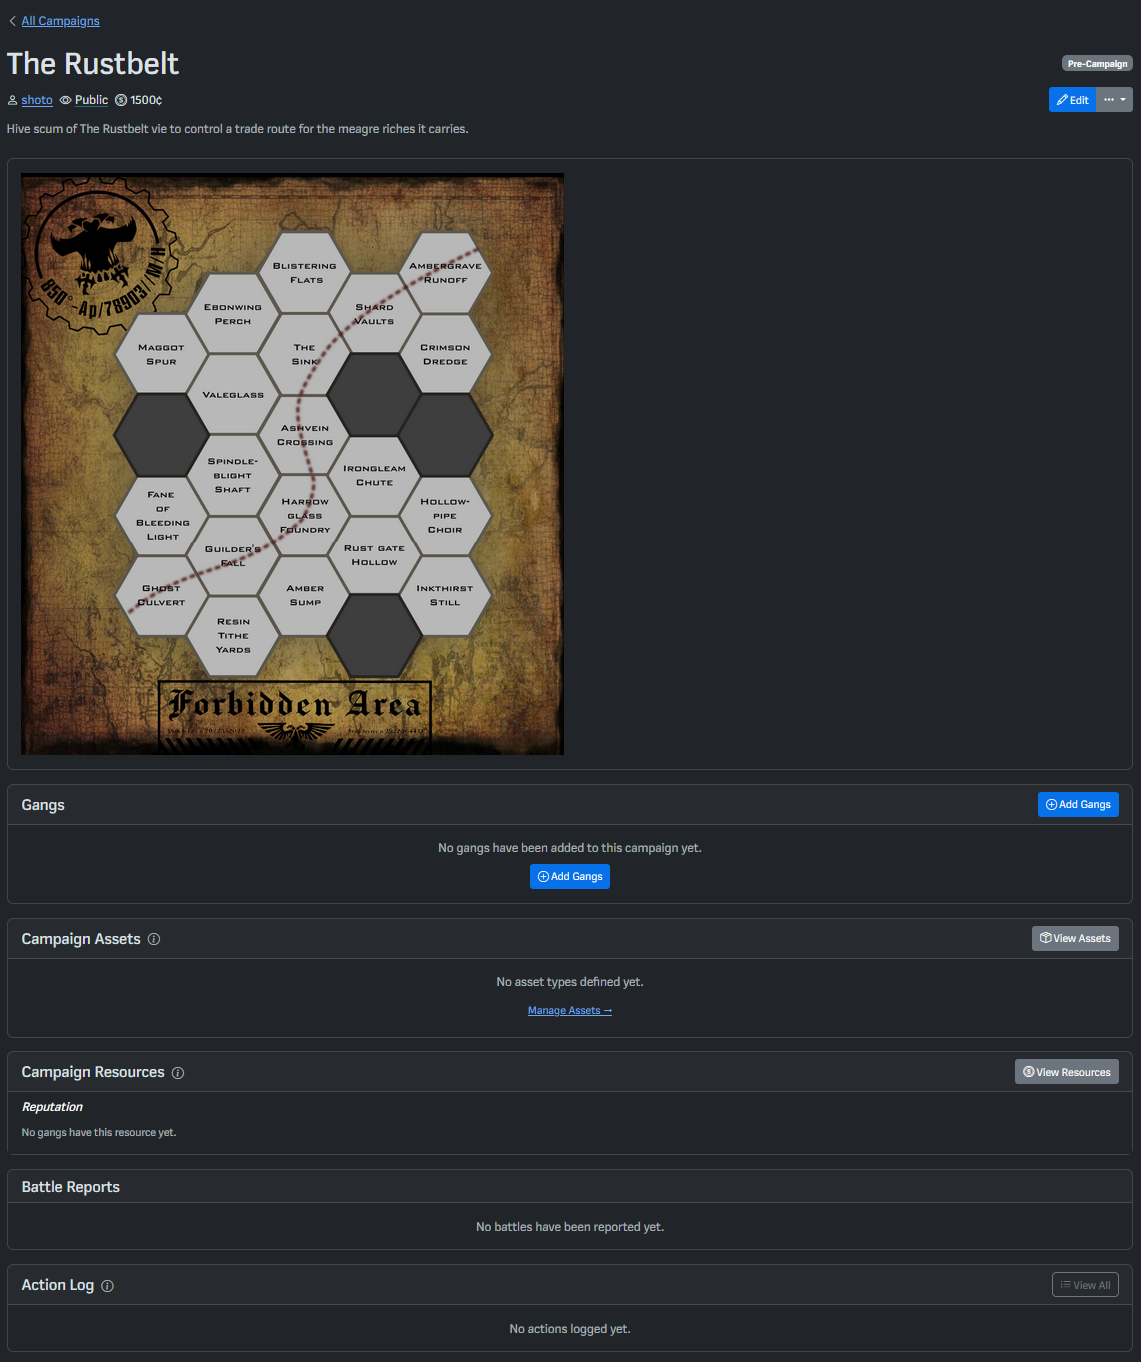 Like gangs, campaigns operate across several modes: Pre-Campaign, In Process and Post-Campaign. A newly-created campaign will be in Pre-Campaign mode, this means that you can still set things up and get things ready for your players without affecting an ongoing campaign or recording actions to the Action Log. Note the edit button in the top right, you can use this to edit all of the settings in the previous step.
Pre-Campaign
There are several things to set up while in Pre-Campaign mode.
Gangs
In this section you can invite gangs to join your campaign. Pressing Add Gangs takes you to a separate page where you can search for the gangs you want to add.
You can search by gang name or username. Once you find the gang you are looking for press Add to send an invite to the campaign. Add as many gangs as you like to your campaign and then press Back to Campaign in the top left.
Campaign Assets
Assets are the unique things that gangs want to collect in your campaign. For example, triumphs or territories in a Dominion campaign. We will use territories as our example. Click View Assets or Manage Assets and then Add Asset Type to get started
On this page, you can name the asset type, include a singular (e.g. Territory) and a plural (Territories) name, this will the make UI and Action Log make more sense later on. In the description section, you can also describe what the asset represents or include some relevant rules for quick reference. When you are ready, click Create Asset Type. This takes us back to the Campaign Assets page.

Now our new asset type is visible, we can add instances of this asset type by pressing the Add Territory buttons. On the next screen, name each asset and add a description if you like.
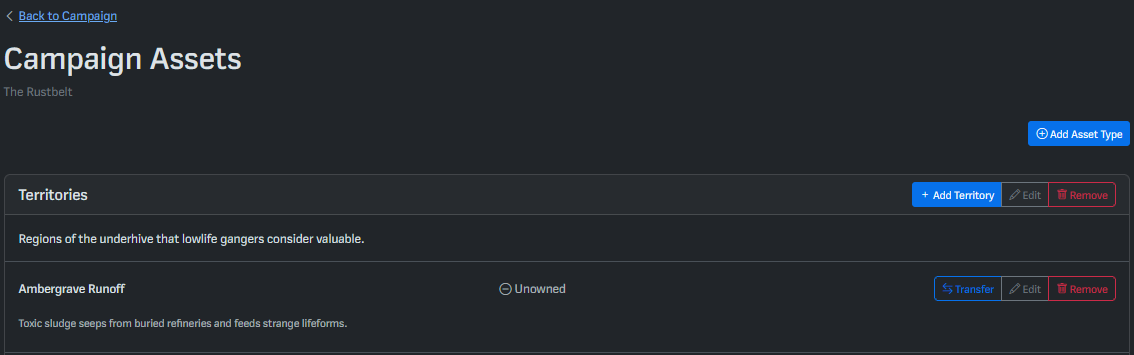
Repeat this process for each asset type in your campaign and then press Back to Campaign in the top left.
[N.B. We know this part is a bit labour-intensive, and are working on new tech to speed this up!]
Campaign resources
Campaign resources are for the fungible, non-unique things that gangs want to collect in your campaig. For example, reputation or meat. Click View Resources to get started.
From the Campaign Resources page, you can see that Reputation is automatically included in new campaigns, but you can add more options, by pressing Add Resource Type.
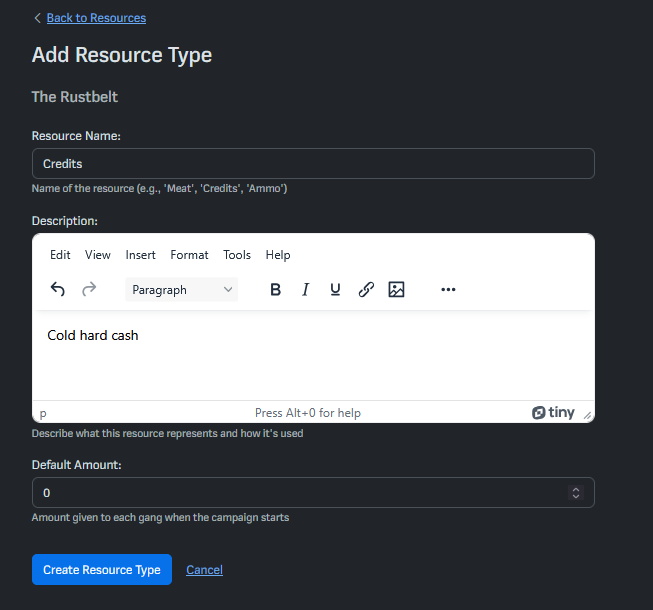
As is probably familiar by now, you can name the resource and describe it, like in previous sections. You can also define a starting amount for each player at the beginning of the campaign. Once you are ready, click Create Resource Type to add it to your campaign.
The exception to this is credits, which are baked into lists. Players add credits to their own gangs, and credit changes to a campaign gang are recorded in the Action Log.
Getting the show on the road
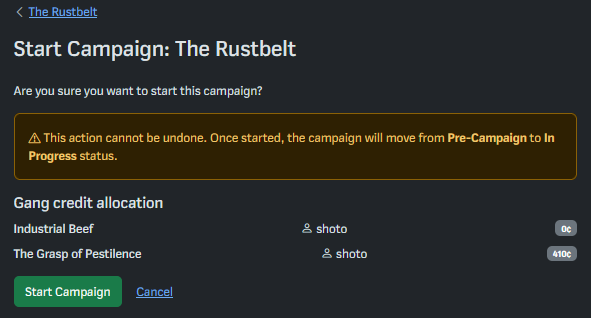
Once you are happy with how your campaign is set up and your players have accepted their invitations, it’s time to start the campaign.
Press the green start button at the top of the page to get things rolling. A confirmation page will show, this also shows the number of credits allocated to each gang if they are below the starting amount. Note that Gyrinx will not prevent overbudget gangs from participating in the campaign, so watch out!
In Progress
We’re cooking now! Once the campaign has started, Gyrinx will make a clone of all the gangs involved. This means that players can continue to tinker with the original versions of their gang, but the changes to the campaign mode gang will now be tracked by the Action Log for you to keep an eye on.
If you haven’t already, go read the guide to campaigns for players to understand how they will interact with the Campaign Dashboard.
Transferring Campaign Assets
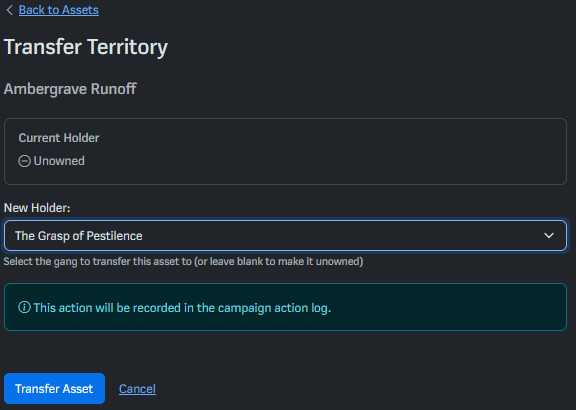
As battles are fought in the campaign, you will need to award campaign assets to the victors. Now that the campaign is up and running, you can assign the assets you created earlier. Click Transfer on the appropriate asset either from the main page or from the Campaign Assets page to begin a transfer.
From the Transfer [Asset] page, you can select the asset’s new owner. This will be recorded in the Action Log.
You can transfer campaign resources in almost exactly the same way.
The dust settles
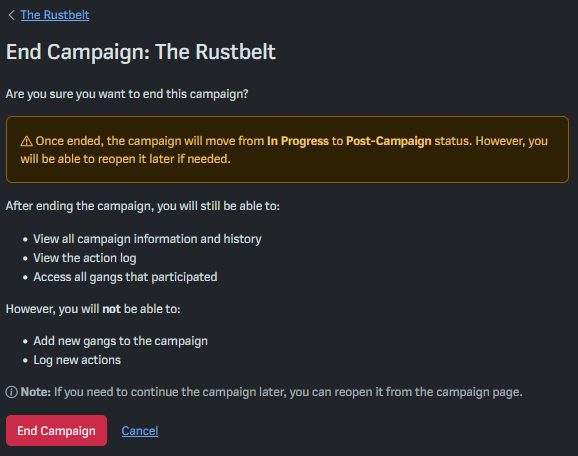
After the chaos has subsided, the campaign is over. You can end the campaign by clicking End at the top right of the campaign page. This changes the campaign into Post-Campaign mode.
Post-Campaign
Once the campaign is over and in post-campaign mode, you can no longer add new gangs or log new actions. All your gangs and actions until that point will remain visible for players to come and revisit later on. If you later decide you want to continue with the campaign you can click Reopen at any time!
Tips and tricks
- Players will always see the campaign summary at the top of the Campaign Dashboard, so you can use to make announcements to players.